Weekly Deals
 Water Heaters
 Accessories
 Installation
 Parts
Parts
 Protection Plans


Installation Insights: Setting Up Your Eccotemp Tankless Water Heater
When it comes to achieving energy efficiency and hot water on demand, Eccotemp tankless water heaters offer a modern solution for homeowners and outdoor enthusiasts. Whether you're upgrading your home system or planning a DIY project for your tiny home, RV, or cabin, learning how to install a tankless water heater is a must. This Eccotemp installation guide breaks down everything from safety considerations to venting options—making setup approachable for both beginners and professionals.
Know Before You Begin: Installation Essentials
Before diving into installation, it’s important to identify which Eccotemp model fits your home, cabin, or mobile setup. Installation depends heavily on your chosen model—whether propane or electric, indoor or outdoor.
Portable water heaters are perfect for off-grid use, as they typically run on propane and don’t require electricity. Propane or natural gas-powered tankless water heaters are ideal for homes equipped with gas lines, though installation involves additional considerations like proper gas connections and ventilation. In contrast, electric tankless water heaters are generally easier to install but require access to a breaker panel with adequate amperage.
Whichever model you choose, it’s essential to carefully read the Eccotemp installation manual before getting started to ensure a safe and efficient setup.
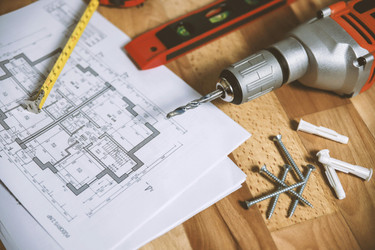
Tools and Materials You’ll Need
Having the right tools and materials on hand is essential for a smooth installation. While many Eccotemp models include an installation kit, additional plumbing or electrical supplies may be required depending on your setup.
You’ll typically need adjustable wrenches, Teflon tape, a drill, screws, and a level. For gas models, you’ll need gas line fittings. Water lines and shut-off valves are essential for all models, while electric heaters will also require conduit and appropriate wiring materials.
Vent kits are necessary for indoor gas models. Don’t forget to use safety gloves and goggles throughout the process.
Understand Local Building Codes and Permits
Before starting installation, it’s important to check your local building codes and determine if a permit is required. Many municipalities have strict guidelines concerning gas, electrical, and plumbing work. Some areas allow DIY installations but may require inspection or code compliance verification after the work is completed. You’ll need to follow rules concerning venting clearances for indoor installations, proper shut-off valves for gas connections, electrical grounding for electric models, and any specific requirements for exterior mounting. When in doubt, consult a licensed professional or contact your local building department to ensure your installation meets legal and safety standards.
Step-by-Step Installation Guide
This Eccotemp installation guide provides a general outline for installing a wall-mounted tankless water heater. While the exact process may vary depending on the model and location, the overall structure remains consistent across most installations.
Step 1: Choose a Suitable Installation Spot
Select a location that provides adequate airflow and ventilation, offers easy access to plumbing and electrical connections, and protects the water heater from freezing temperatures or direct exposure to rain. Use a level to mark the mounting points and ensure everything is aligned before drilling.
Step 2: Mounting the Water Heater
Secure the water heater to the wall using the appropriate mounting hardware. Follow the specifications in your Eccotemp manual to allow for adequate airflow and proper spacing. Make sure the heater is installed at the correct height for accessibility and efficiency.
Step 3: Connect the Water Supply Lines
Begin by connecting the cold water inlet and hot water outlet using the appropriate fittings. Apply Teflon tape to all threaded connections to prevent leaks. Install shut-off valves on both lines to allow for future maintenance. If your area has hard water, consider installing a sediment filter to prevent mineral buildup inside the heater. Before proceeding, open the cold water valve briefly to check for leaks in the connections.
Step 4: Connect the Gas Line (For Propane/Natural Gas Models)
If you're using a gas-powered model, connect the gas line using approved materials and techniques. Always use yellow Teflon tape specifically designed for gas threads. After connecting, perform a leak test using a soapy water solution. If bubbles appear, there is a leak that must be addressed before moving forward. Include a shut-off valve and check valve as required by code. If you're not experienced in handling gas lines, it's best to hire a licensed professional.
Step 5: Venting for Indoor Gas Models
For indoor gas models, proper venting is essential to ensure safe operation. Eccotemp offers stainless steel vent kits that are UL-certified for indoor use. Install the vent pipe either vertically through the roof or horizontally through an exterior wall, depending on your model's configuration. All joints must be properly sealed to prevent exhaust gas leaks. Follow the clearance requirements listed in the installation manual and never substitute plastic or non-rated venting materials.
Step 6: Electrical Connection (For Electric Models)
For electric water heaters, begin by turning off the breaker at the electrical panel. Use appropriately sized wire and conduit to make the electrical connections. Connect the wires to the designated terminals inside the water heater and ensure the ground wire is securely attached. Electric models typically require a dedicated breaker of 120 amps, depending on the heater's power rating. If you're not confident in your electrical skills, consult a certified electrician. Learn more about our Electric Tankless Water Heaters.
Step 7: Test the System
Once all connections are in place, it’s time to test the system. Start by opening the water valves and allowing water to flow through the lines to purge any air. Turn on the gas or power supply, depending on your model. Open a hot water tap to trigger the heater and check for consistent ignition and proper water temperature. Observe the system for leaks or unusual sounds and make any adjustments as needed.
DIY vs Professional Installation
Whether to install the water heater yourself or hire a professional depends on your experience and the complexity of your installation.
DIY installation may be suitable if you have prior plumbing or electrical experience and are installing a portable or outdoor model with minimal requirements. It’s also an option if your local codes permit self-installation without inspections. On the other hand, hiring a professional is highly recommended if you're working with natural gas lines, need to upgrade your electrical panel, or are handling an indoor installation that requires advanced venting techniques. Keep in mind that some Eccotemp warranties may require professional installation for certain models, so be sure to read the warranty terms carefully.
Safety Tips for Every Installer
Safety should always be a top priority during installation. Make sure all utilities—water, gas, and electricity—are turned off before beginning work. Always wear gloves and eye protection. Use only sealants and tapes approved for gas or water lines. After installation, test all connections carefully for leaks before activating the system. For gas models installed indoors, ensure that venting is done correctly to avoid carbon monoxide buildup.
Register Your Product and Understand the Warranty
Once your Eccotemp tankless water heater is successfully installed, register the product on the Eccotemp website to activate your warranty. Registration ensures you receive customer support if any technical issues arise and allows for faster replacement of parts if needed. Keep a copy of your purchase receipt and note the installation date and any professional services used. This documentation can be valuable for future service claims.
Maintenance Tips to Keep It Running Smoothly
Proper maintenance will extend the life of your tankless water heater and keep it operating efficiently. Flush the system every six to twelve months to remove any mineral buildup, especially if you live in an area with hard water. Regularly inspect the vent pipes for blockages or damage. Check your gas and water lines monthly for any signs of leaks. If your model includes a filter, clean or replace it according to the manufacturer's recommendations. Use a descaling solution or white vinegar when flushing the system to prevent internal corrosion.
Final Thoughts: Ready to Install Your Eccotemp Tankless Water Heater?
Installing an Eccotemp tankless water heater doesn’t have to be complicated. With the right preparation, attention to detail, and understanding of how to install a tankless water heater safely, you can enjoy reliable hot water in a variety of settings—from homes and cabins to RVs and off-grid adventures.
This Eccotemp installation guide provides the essential knowledge needed to get started with confidence. Whether you're taking on the project as a DIY enthusiast or working alongside a licensed plumber, following each step carefully will ensure a safe and long-lasting installation.
Explore More from Eccotemp
To get the most out of your water heating system, explore the full range of accessories and maintenance tools offered by Eccotemp. From vent kits and descaling products to portable outdoor heaters for camping and travel, Eccotemp has everything you need to stay prepared and comfortable.
FAQ: Installing Your Eccotemp Tankless Water Heater
1. Who should install the heater?
A licensed plumber or electrician should install the water heater to ensure safety and compliance with local codes, as incorrect setup can lead to serious risks like gas leaks or electrical hazards.
2. Where is the best place to install it?
Choose a location that’s accessible, away from freezing temperatures, has proper clearance from flammable materials, and is close to the main water supply. Indoor models also need proper ventilation.
3. What should I know about the water supply?
The water heater needs stable water pressure, tightly sealed connections, a clean filter, and properly insulated pipes to function efficiently.
4. Are there any electrical or gas setup requirements?
Electric units require a dedicated 240V circuit with the right breaker, wiring, and GFCI protection. Gas models need the correct gas type, adequate pressure, and properly installed shut-off valves, unions, and sediment traps.
5. How should the unit be vented?
Indoor gas models must be vented using the proper size pipe—usually 2.5 inches—either horizontally or vertically. Outdoor models should be shielded from wind and have drain protection if installed in cold climates.
6. Do I need a pressure relief valve?
Yes, a pressure relief valve is required and should be installed with a drain line that’s safe from freezing conditions.
7. How often should I maintain the unit?
You should flush or descale your tankless heater twice a year to prevent mineral buildup and keep it running efficiently.
8. What kind of support and warranty does Eccotemp offer?
Eccotemp provides a 5-year warranty on the heat exchanger and a 2-year warranty on parts for the i12 series, along with free accessories within 30 days, live chat support, helpful guides, and post-purchase consultations.